Showing posts with label candles. Show all posts

Wednesday, July 16, 2025

A unique project: transferring a picture to a candle


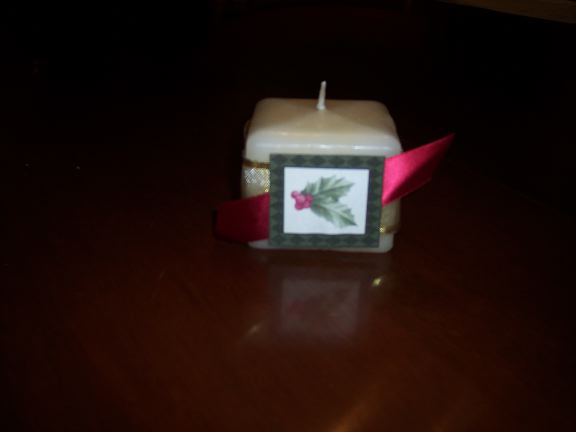
 I've had this idea saved for awhile, and it occurs to me that summer might be a nice time to try it.  This is not the same as what I have pictured at top; that one was made very simply with card stock cutouts and ribbon.  As you will see, the project I'm linking to today does not involve an actual candle, but the flameless type which makes the procedure much safer.

This tutorial is from Diana at Dreams Factory: How to Put a Picture on a Candle.  

The tutorial includes some beautiful printables to create candles for either Christmas 

or Autumn.

Other than the printables, supplies needed include a printer (laser for best results); tissue paper (plus paper tape and card stock to use in the tissue paper printing process); scissors; wax paper; flameless battery-operated WAX candles (not plastic); and a hair dryer or heat gun.

After printing your design of choice on tissue paper following Diana's directions, you then proceed to apply it to the candle using wax paper and a heat gun or hair dryer.  I won't go into detail here; you can read Diana's post for yourself and see just how it's done.

What do you think?  Is this a technique you would attempt?  The result is certainly beautiful!


Friday, December 10, 2021

Candle glow


 Glowing candles are some of the most meaningful images on Christmas cards, especially the vintage ones.  The ones on the card above are a case in point.  (I really love the Christmas pastels, but that will be a post for another day.)  But just look at those glowing flames, wavering in the air, and the glittery halos around them.  So, so pretty.

This Christmas season I have been thinking a lot about candles.  As I mentioned in my Hodgepodge post at my Kitchen Table blog, one line from a Christmas tune has kept jumping out at me as I occasionally listen to our more-or-less local Christmas music station.  "I've got the candles glowing in the dark."  Times seem dark lately, do they not?  How important it is to keep the candles glowing. 

 
I may have mentioned this before, I'm not sure.  But last winter we did a lot of traveling to and from the home of friends for Bible study and a meal.  It became a very familiar route and we were usually traveling after dark at least for the trip home.  We so enjoyed seeing all of the lights glowing from people's homes.  There were lighted trees in windows, candles in windows, lights illuminating porches and outlining roofs,  lighted trees in people's yards.  One house that always caught my eye had long windows on either side of the front door, and long swathes of light spilled out onto the snow.  As the winter went on, Christmas and New Year's passed by and most people left their lights up.  It was a delight to see and I came to see it as a way of pushing back against the dark winter we had been promised.  It would only be dark if we allowed it to be!

This thought has stayed with me.  Mr. T and I need to do more with lights at our own home.  We have white lights up year-round inside in our bedroom and the living room, but I would like for us to do more, maybe with candles in the windows.  One thing we have done, even though our little camp is a very seasonal place and we won't spend much time there during the winter, is to place a lighted Christmas tree (with lights on a timer) in the loft window.  There are four windows in the living room below and, although these do not have window sills as such, Mr. T has plans to make a small temporary shelf below each one to hold an electric candle.  I will post photos if I am able to get them from the road.

 This Christmas season, as well as all through the dark winter, let's be sure our lights are glowing in the dark!
Friday, April 10, 2020

Lighting up the darkness with vintage candles


Here's a fun Christmas-related project that we recently did.  While clearing out the Christmas decoration storage area at my parents' house, we found some vintage candoliers -- the window candles with a base to set on a window sill.  The ones we found have eight candles each.  Amazingly, these antique lights still work -- and there were extra light bulbs with them!
The cute little box above contained extra bulbs.  Later, we found another, larger cardboard box with a bunch of extra bulbs in it.

Knowing that some folks are displaying candles in their windows these days as a sign of hope, and some towns have even lit the Christmas lights on Main Street, we decided to fit the candolier out with red, white, and blue lights and place it in one of our porch windows.

This worked pretty well until we decided to put the lights on a timer -- from 7 to 10 pm and then in the early morning from 5 to 7 am.  We're not sure if it's just the sheer antiquity of the lights -- they are at least 70 years old! -- or just that the timer is too modern for them, but they keep going out.  The cold damp weather could also be causing issues, we think.  These are the type where if one bulb goes out, none of the others will work.  Thankfully, my hubby has a tester that can determine which bulbs are bad.

We've now fitted it out with more working bulbs and placed it in an upstairs dormer.  Hopefully that makes a difference and the lights keep working.  This is a fun and unique way to show our patriotism.
When we see lights in people's windows, or glowing brightly in a downtown, let's thank God for the hope we have in Him and be faithful to pray for our country!

Sunday, December 16, 2018

A fun idea for rustic Christmas decorating ... or gifting!


Image by Twigg Studios
This project reminds me of a lovely gift we received one year from our future son-in-law when he was in college.  He made a very pretty gift out of a decorative glass bottle filled with greenery and berries, water and, I think, some oil.  A floating wick was then placed on top and the wick could be lit to serve as a sort of candle or oil lamp.  Some people made these without oil or a wick and simply placed a round floating candle on top.

When I saw this Rustic Holiday Mason Jar Diffuser by Mary Beth at The How-To Home, I immediately thought of that long-ago gift -- they have been married for 18 years now!  I went looking to see if I could find a photo with the lamp in it.  (No digital camera in those days!)  In the only photo I could find, the lamp was on a table with other decorative items and it was just too dark to show up well.  Eventually the greenery molded (though that took a long time) and had to be discarded.

I'm sure that you can get an idea of how it looked when you see Mary Beth's photo, below:
Photo by Mary Beth at The How-To Home (formerly Cupcakes and Crinoline)
Her diffuser is an even more practical idea in that it requires no water, is not flammable, and the greenery will not mold.  Who knew diffuser lids were available for Mason jars?  Certainly not me!

Have fun with this idea!

Friday, July 07, 2017

A lovely gift or decoration -- decoupaged glitter candles


Photo and design by Ashlee at My So-Called Crafty Life
I spotted these gorgeous decoupaged glitter candles at My So-Called Crafty Life and just had to share the link.  Ashlee is such a talented designer, and I especially love those crafts she designs with a vintage flair. 

I've read before about decoupaging candles with paper napkins and have long been intrigued, though I have never gotten around to trying to make any.  Paper napkins can be found in such glorious designs and patterns, and are a very inexpensive crafting medium indeed.  For Christmas gifts, you could use either holiday napkins or something else that you know the recipient would enjoy.  The glitter adds such an amazing touch to this simple craft.

Have fun with this idea!  I hope to!

Saturday, January 19, 2008

Another fun project!


Here's another fun project I found at the Oh! Christmas craft forum. Remember the bits & pieces bows? Well, here is the second project using leftover bits & pieces from Christmas wrapping and crafting. These are called candle collars. You can find the instructions and a link to pictures here:
Candle Collars.

I only had one pillar-type candle on hand -- a small square one -- so I was somewhat limited in what I could use for trims. I used a pretty, wide gold ribbon as the base for the collar. The ends of the ribbon are concealed by a cutout of holly from a Christmas card, and I added a snip of dark red ribbon between the two. The gold ribbon is secured on three sides by shiny gold tacks. The ends of the ribbon are glued to the candle with craft glue, as are the other items.

I wanted to simply use what I had on hand, in the spirit of this project. But I'm going to be keeping my eye out for suitable candles at any clearance sales I may see.

It probably wouldn't be safe to actually burn this candle, as it so short and the collar takes up so much of the space, but I wanted to try this project anyway just for fun. And fun it was! I could get addicted to these bits & pieces projects...
