Showing posts with label Christmas trees. Show all posts

Saturday, July 11, 2026

A visit to the Christmas Loft


A Saturday seems like a good day to post about a staycation day we took back in January.  It was the day after my birthday, and we had gone out to lunch here: Lincoln Diner.  I failed to take any pictures while there, but here is their logo (I love  how it resembles a White Mountain National Forest sign:

After lunch, we decided to visit The Christmas Loft in the next town.  We were hoping for some after-Christmas bargains, but there really weren't any.  Still it's an enchanting shop and well worth a visit if you are in the area.

Snagged this image from their website.  It's nicer than my Kindle photo at top.

A whimsical welcome sign greeted us and I love the snowflake ribbon on the wreath.

Below are some images from the various themed trees in this shop.

From a tree featuring cardinals.  Isn't it beautiful?

This tree has a gingerbread/baking theme -- this photo is a close-up of the tree below.

A little more of the gingerbread/baking tree.

Pretty tree with ornaments and all white lights

A peppermint themed tree

This one seemed to have a snow sports theme.  Note the skis as the tree topper!  It also had snowflakes, snowballs and frosty pine cones.

We really enjoyed seeing all of the festively themed trees, and there are also many, many scenes set up with various villages.  We didn't find a lot that we needed or could afford, but we wanted to get a little something as a memory of the day.  

So what we ended up with was an ornament but it is not at all Christmasy.  Below is a scan of it.


The bag they put the ornament in was so fun!  I had to scan it and show you all. 

This sweet bit of decor is living permanently at our little cottage, Lakeview Lodge.  One of the kitchen cabinet doors is the perfect place for it.  Our daughter had painted the cabinets in 2020 with a gray chalk paint as part of the renovations.  Over time the paint has crazed a bit and I actually love the look.  The sweet glass cabinet knobs are original.

What a fun way to celebrate my birthday!  And we have a special year-round ornament at our little cottage to remind us of our visit to the Christmas Loft!

Wednesday, July 23, 2025

Faux clip-on candles for the Christmas tree


This is such a neat idea from Ashley at Lil Blue Boo Blog: How to make clothespin clip-on candles. These are made from the peg type of wooden clothespins, spray-painted white and then artfully dribbled with hot glue to resemble wax drippings.  Another coat of white paint is added when the glue is dry and cooled.

Flames are made with teardrop shaped wood pieces, painted with yellow and orange acrylic paint.  Then these are glued to the top of each clothespin "candle".  Ashley has a fabulous tutorial.that looks simple and easy to follow.  The finished candles can easily be clipped right on to a Christmas tree branch.

Photo by Ashley at Lil Blue Boo blog

This is one of those ideas that I would never in this world thought of on my own.  I've had it pinned to my Crafting for Christmas board on Pinterest for quite some time.  So thankful I finally got around to checking it out!

Thursday, January 06, 2022

Book review: The Farm Chicks Christmas


 I was putting away some of my Christmas books today (not all -- I am still going through some of them) and it occurred to me that I might share a review of one of my favorites, The Farm Chicks Christmas.  This is a Country Living book and the author is Serena Thompson.  This was not even a book that I was aware of until I won a hardcover copy in a giveaway.  After I received the book and paged through it, I knew that this was a book both of my daughters would enjoy -- so I went to Thriftbooks and found a copy for each of them.  So now I'd like to share this fun book with all of you.

In all honesty, I don't think I have ever heard of The Farm Chicks prior to winning this book.  You can learn more about them here: The Farm Chicks.  And you can learn the fascinating life story of author Serena Thompson here: About Serena.  This is a gorgeous book full of decorating ideas, traditions, recipes, and much more.  And all incredibly photographed!

Honestly, I wish that I could share each and every photo with you, but of course I can't.  I will content myself with simply going through the table of contents and sharing the highlights of the book with you.  I'll add in a few vintage-y images of my own, because the photography and design of this book are just glorious and I won't even try to scan the pages to show you.

The book is divided into two parts: The Spirit of the Season with 2 chapters; and At Home for the Holidays with 7 chapters.

In The Spirit of the Season, the first chapter is called 'Tis lovely to give.  It is filled with ideas and traditions from Serena's childhood and from her life now with her husband Colin and their children.

The second chapter is called A Visit to the Tree Farm and tells about the Thompson family's annual Christmas tree hunting tradition with friends.  The last 2 pages in this chapter contain many warm beverage recipes, titled "Ways to Ward Off the Chill".  There's spiced cider, hot mocha, chai latte and more.
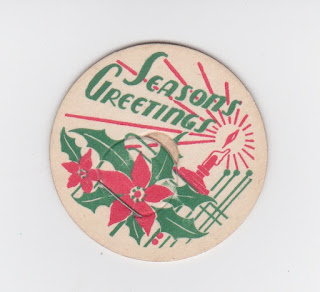
A vintage milk bottle cap!
 
In the section At Home for the Holidays, the first chapter is Holiday Welcome.  It includes dozens of ideas for front porches and other outdoor decorating and how to make every corner bright.    There are even patterns -- for example, one for a holiday scalloped bunting made out of assorted fabrics in Christmas colors.

The next chapter is The Decorated Tree.  This includes photos of four different decorated Christmas trees, a lovely story about a tinfoil star, and directions for making sweet tree trims like snowball pompom ornaments and silhouette ornaments.  It also has a page of fun ways of displaying vintage Christmas light bulbs and balls.  If I remember, I'll do a jar of vintage light bulbs for next year!

This chapter also has a section called The Gift of Giving, which includes many ideas for gift wrap, gift card holders, and festive shipping ideas.  

The next chapter is called Wreaths and Garlands.  It includes many fun ideas, and pages of glorious photos.  There are instructions for making a sweet paper garland  and a wreath made from balls of yarn.  The section Make Every Corner Bright gives many ideas for decorating with greenery and other natural accents.

 The chapter Cupboards and Corners is next.     It includes page after page of beautifully inspiring photos, and also fun crafts like colorful cone trees and a wrapping paper village.  There's a feature on Christmas collections, too.  There is SO much inspiration in this chapter that no description of mine can ever do it justice.

Kitchens and Pantries is the next chapter, and it is even more fun than the one before it.  A full 20 pages of glorious, inspiring photography and fun, fun ideas for decorating kitchens and pantries and for packaging food gifts and more.  There are ideas for displaying kitchen treasures and directions for making a "Merry" banner.

Next comes a chapter titled Happy Memories.  Again, no descriptive words of mine can describe the delight of this chapter.  All manner of vintage items are pictured, from a sequined felt stocking to a metal toy barn decorated for Christmas to toy trucks and a plaid thermos with a sprig of greenery -- oh, just beautiful!  There are also directions for making a gumdrop wreath, felt stemware coasters, and paper serving cones for snack mixes.

The last chapter is called Holiday Recipes and it is filled with ideas for beverages, cakes, nut recipes, cookies and tarts (lots of cookie recipes!), and even a page of Cookie Tips.  

 Lastly in the book are several pages of recipe cards and stickers to use in giving your country kitchen gifts to others.  Just one last touch of vintage sweetness!

I'm sure you can tell that I'm enchanted by this book.  Highly recommend it to all of you!

Wednesday, December 19, 2018

An easy reversible Christmas tree skirt


A few years ago, my Nevada daughter sent me the gorgeous fabric you see above.  You can read about this fabulous gift, and why I was so thrilled with it,  here: A gift with possibilities.  I knew that whatever I chose to use it for, it should be a project that would showcase the beautiful illustrations.

Last year after Christmas I decided that I would like to make a Christmas tree skirt from this fabric.  As is typical with me, however, I forgot all about it until it was time to put the Christmas tree up this December.

I wanted to make the skirt reversible as I thought a double layer of fabric would look nicer and hold its shape better, though I doubt I will ever use the other side.  Here is the fabric I chose for the reverse side:                       ⬅

I looked a bit in some Christmas books and online and sort of cobbled together an easy technique for making the tree skirt.

First, I obviously had to make my fabrics into large circles.  I had just done something fairly similar when cutting a circle for the top part of a chef's hat, so it was familiar.  I folded my first fabric from top to bottom, then from left to right to form a square, and pressed it well.  I measured from the corner to one edge of the folded square (where the arrow is pointing above).  This measurement was just over 18 inches, so I decided to work with 18 inches. 

I worked my way around the square with a yardstick, measuring and marking 18 inches from the right corner all around the square, using a water-soluble marker.  Then I connected the dots to form a curved line, and cut on that line.

(There are other ways this measuring can be done; Gooseberry Patch suggests using a string of your desired length and tacking it to the folded corner with a thumbtack to hold it taut while you move the other end of the string along and make your markings.  Sort of like a compass you used to make curved lines in Geometry class back in the day.)

I then unfolded the resulting large circle and used the folds that I'd pressed in to help me eyeball the center of the circle.  I then used the lid of a large glitter container -- 2 inches or more -- any round object of similar size would do -- to draw a circle in the very center.  This would be the hole for the tree trunk.  Then I cut along one of the folds to this circle and cut out the circle.

I placed my cut fabric circle face down on the backing fabric, which I had laid out face up -- so that the right sides of the two fabrics faced one another.  Then I used the cut circle as a pattern to cut a matching shape from the backing fabric.

Putting the skirt together was easy.  I pinned the two circles together well and stitched all the way around the cut edges using a 1/2 inch seam allowance and leaving a 6-inch opening to turn the tree skirt right side out.   I trimmed the seam allowance of the small circle down a bit and carefully clipped into the curved edge, not going through the stitching.  I also snipped off the corners of the tree skirt where the curved and straight edges of the bottom formed right angles.

Then I turned the tree skirt right side out (making sure to poke out the corners to make them nice and square) and carefully pressed it, then hand-stitched the 6-inch opening closed.  I had actually planned to topstitch around the entire tree skirt, stitching up the opening in the process, but I decided that topstitching might detract from the fabric design, and I just didn't want to do that. 

So I pressed it well one last time and arranged it around the base of the Christmas tree, covering the stand and just overlapping the edges as desired.  It actually took far longer to write about making the skirt than it did to do the project.  I would say it took maybe an hour and a half from start to finish.


And there you have it -- my Holly Pond Hill Christmas tree skirt.  I love it!


Friday, December 14, 2018

A fun craft project -- glittery little trees!


Photo by Diana at Adirondack Girl at Heart
Here's a project I've been wanting to try for quite some time now: Glittery little trees made from toilet paper tubes!  This is another design by the ever-creative Diana at Adirondack Girl at Heart.


Back when I first saw this idea (2015) I started saving toilet paper tubes to use for these little trees.  (Don't worry; I haven't been saving them ever since!)  I think I saved about a dozen.  I split them up the side, which is what needs to happen to turn them into cones, and stashed them in a ziptop bag with my crafting supplies.  I think I have everything else on hand that I might need to make some of these adorable trees. 

Can't you just picture these displayed with bottle brush trees and glittery little houses like those above to make an enchanted village?

With my handmade gifts completed, I may find time to tackle some simple Christmas crafts like this one.  We will see!

Thursday, December 21, 2017

Just for fun


I so enjoy the look of Christmas trees atop vehicles that I have an entire Pinterest board titled "Bringing Home the Tree."  I actually obtained the pattern for that mug rug you see at top right, but of course I've had no time to sew one.  Maybe this winter!

We don't have any adorable vintage toy trucks around our house, so even though I've seen those with trees lashed to their tops or in the back, that wasn't an option for creating my own tree-toting vehicle.  Then Tuesday I happened to notice a metal bank we have in the form of an old pickup truck.  I decided to see if the bottle brush trees I had were the correct scale.  Close enough!  I tied it to the truck with vintage, faded red string. 

I was pleased with how it came out.  Just for fun.


Thursday, July 27, 2017

A sweet decorating idea ~ miniature teacup trees


I've long been fascinated by the idea of miniature Christmas trees in teacups or sugar bowls.  They just look so sweet.  Some years ago I made some soft fabric trees, and this green one looks right at home in a Christmas teacup.

Even prettier is this teacup tree
 from Sandi at Rose Chintz Cottage.  Sandi also has a beautiful Christmas blog called Christmas Pudding, which is well worth a visit for some lovely Christmas inspiration.  To read more about Sandi's teacup tree and how she uses teacups in her holiday decorating, go here: Mini Tree in a Teacup.

Lovely as these ideas are, Tuula at Thrifty Rebel Vintage has taken them a step further with her mini teacup Christmas trees, using miniature teacups.  Aren't they sweet?

Photo by Thrifty Rebel Vintage
In my cleaning out of a home and years of accumulation, I have found tiny souvenir teacups as well as children's toy tea sets that would work perfectly for this. What is even neater is that Tuula doesn't glue the trees in place; she just places them securely in the teacups.  That way, both teacup and tree may be used again in different ways.

This is a genius idea,  in my view.  Hope someone else has been inspired by it, as well!

Friday, July 21, 2017

Adorable mini trees for ornaments or place card holders


Photo from Cupcakes and Crinoline
This fun craft is from Mary Beth at Cupcakes and Crinoline: it's adorable mini Christmas tree ornaments and place cards!

I'm always enamored of bottle brush trees, and these teensy ones are the cutest ever.  They are placed atop wooden spools gussied up with vintage newsprint and liberal amounts of glitter.  This would be an easy craft to do at the picnic table this summer! 

To make them into place card holders, add a strip of newsprint with the person's name on it by pinning it to the tree with a corsage pin.  (Admittedly not a good idea for kids.)

A piece of pretty baker's twine may be tied around each spool to add color, but I sort of like them just as is. 

Have fun with this idea!

Friday, January 27, 2017

Bringing Home the Tree


I just had to share a couple of things.  First of all, remember that plate above?  It was a Christmas gift from my wonderful daughter Carrie.  A few weeks later, we were celebrating my birthday at Carrie's home.  As I unwrapped a package, I commented that the box felt like the right size and shape to contain an electric wax or tart warmer.  Carrie was smiling ...

I was right!  I had no idea what the wax warmer would look like, however.   Oh, what fun!  It matches the plates!  Even more fun, the headlights of the station wagon are actually openings where the light can shine through when the wax warmer is in use.

I couldn't resist.  I recently started a new Pinterest board, Bringing Home the Tree.  Head on over and visit if, like me, you never really get enough of Christmas.

Tuesday, January 10, 2017

Oh what fun!


... it is to ride in a car with a tree on top!  🌲

I've shared before how I love the look of vehicles with Christmas trees on top.  My daughter Carrie knows me well!  She gave me a glittery gift bag with a scene similar to this on it, though not exactly the same:
image from Pinterest
In the bag were the adorable Christmas cards which you see at the top of the post, plus several other fun items she had found.

Sorry for the blurry picture; but this is a sweet tray.
The blurry photo doesn't show the details well, but I love the red and black checked border!
Just the cutest!
She found the plate above at Walmart and bought two of them for me.  Simply the cutest!  Notice all of the detail on this plate, with the background, snowflakes, and so on.  Love it!

Hope you've had fun viewing some of my favorite gifts ever!

Thursday, July 28, 2016

Christmas trees on vehicles


Photo from It All Started with Paint
I don't think the interest in decorative items featuring Christmas trees tied to vehicles is going away anytime soon.  It's definitely not going anywhere as far as I'm concerned.  I always look forward every year to spotting the first Christmas tree tied to a car top.   In fact, living where we do, we are very apt to see large tractor-trailer loads of Christmas trees headed south from northern New Hampshire or Maine.  Of course we tend to see those long before Thanksgiving -- and Thanksgiving afternoon is usually the first time we will see a Christmas tree atop a car or in the back of a truck.

I've saved a bunch of car-top Christmas tree ideas to my various Christmas boards on Pinterest, and thought I would share a few of them today.  First, the one that's probably my favorite, the ornament pictured at the top of the post.  Linda shares the tutorial at It All Started with Paint.  I am seriously thinking of making some of these if I can find nifty-looking vehicles that are small enough to fit inside the ornaments. 

The other ideas are in no particular order, and I'll give credit where it's due and links to the various blogs so you can check them out for yourselves.  So next is a fun idea for using a tree in a toy truck as a table centerpiece.  This is from Christy at Our Southern Home.
Photo from Our Southern Home
Here's another truck idea, this one from Faye at Wild Rose Vintage.  I love the way Faye has added more trees with shiny baubles and surrounded the truck with vintage ornaments. I think we have a toy truck around that's somewhat similar to this.  Maybe ...
Photo by Wild Rose Vintage
We'll continue with the truck theme, I guess.  Check out this pretty idea from Malia at Yesterday on Tuesday.  Love the wreath on the front of the pickup truck!  You can't tell by looking at this picture below, but this truck and its surrounding scene are inside a large cake dome atop a white cake plate.  Very pretty!
Photo from Yesterday on Tuesday
Here's one last truck idea -- love this one!  It's from Vicky, from Life on Willie Mae Lane.  She has loads of wonderful decorating ideas in this post!
Photo from Life on Willie Mae Lane
Now we'll shift back to cars for a minute.  Up next is a car with tree terrarium shared by Jen at City Farmhouse.  I like the way she uses a slice of birch tree, complete with bark, as the base.  Very creative and different!
Photo from City Farmhouse
The next idea is a fun and whimsical find from Vicky at Life on Willie Mae Lane.

Photo from Life on Willie Mae Lane
 I wouldn't mind finding a set of these plates -- as Vicky did -- somewhere!  She found hers at Tuesday Morning.

Here's a fun vignette from Kimberley at Seaside Ave.
Photo from Seaside Ave
 There's a lot going on in this scene, but I love it!

Next is a nifty centerpiece put together by Mary Beth at Cupcakes and Crinoline.

Photo from Cupcakes and Crinoline
This one also has a lot going on, but it's festive and different.  I like the wrapped packages and the candy canes and evergreen sprigs!

And now for something very different: Thoughts from Alice shares an adorable printable Christmas village including ... yes, you guessed it! Printable Christmas trees on cars!  There is much more to the printable village than what you see below, but it's a sample of the delightful artwork.
Photo by Thoughts from Alice
Isn't it cute?  I need to print out one of these.  I'm one of those people who has never outgrown things like cutting, pasting, and coloring.  And I have no plans to outgrow it.

Just two more.  These are a bit unusual.  The first one does not contain a tree on the vehicle at all, but it could.  One could easily put a tree or trees in the trailer rather than the cargo of ornaments.  This is a vignette by Robin from Happy at Home.   I'm pretty sure my kids had a tractor like this, but it may or may not have been painted blue...

Photo from Happy at Home
You will want to check out Robin's entire post; there are some fantastic decorating ideas here!

My last feature is this whimsical idea from Diane at An Extraordinary Day. 

Photo from An Extraordinary Day
Diane has a real flair for creating vignettes, and this one is unusual and fun, with Santa in a bumper car bringing home the tree atop a vintage camper.

Hope you've enjoyed these fun ideas!