Showing posts with label paper crafts. Show all posts

Saturday, February 07, 2026

Ways to repurpose used Christmas cards and scraps of gift wrap


 It was recently brought to my attention that I've apparently never written a comprehensive post on this topic.  So it's time to do just that!

There are so, so many ideas out there and I have made many of them.  There may even be too many good ideas to share in one post.  We will see how I do with this one. 

Gift tags are, of course, one of the more obvious uses for your Christmas cards. And there are lots of ways to do that.  But here is a post of some of the techniques I've used: gift tags.

A very novel use of Christmas cards is to make little boxes out of them.  This post  tells just how to do that very simply.  I had tried making these boxes in the past, only to find that it was a very complicated process, involving the drawing of many lines and folding them at intersection points, etc.  This procedure is much simpler and more straightforward, and the boxes are just so cute you may find yourself addicted to making them.

Ornaments are also a great way to use Christmas cards.  This post shows how to make an ornament and also a pin!

Two Victorian style ornaments
Pin made using a Christmas tag

 The following posts have other ideas using gift wrap or Christmas cards: Juice-can lid ornaments; ornament from Mason-jar lid.


My granddaughter and I made Christmas card banners one year and they were so much fun to do.  I've been wanting to make some similar ones only for winter.  I could use wintry Christmas card scenes. card stock in shades of blue, navy ribbon, and use snowflake buttons in between the individual pennants.

 One of the first real craft projects I made with used Christmas cards was this one: Christmas card "kissing ball".  I made many of these for gifts over the years.  These are a bit time-consuming but I think the results are worth it.  The one I made for our home has lasted well and has taken on a real vintage look over the years.  It has had to be re-glued in places a few times, but that's a simple matter and easily taken care of.

Below, you see the "kissing ball" hanging in a doorway.
The kissing balls can also be made smaller, using, if I remember right, 1 1/2-inch circles, to produce ornaments that can be hung on the tree.  To do that, I would either simply use glitter on the edges and/or use tiny colorful beads at the intersections.  I've made these smaller ones in the past and just used glitter, but small colorful beads (in place of the mini Christmas balls used on the large ones) should look nice too.

So there you have a few ideas!  I've got more thoughts buzzing in my mind, and I know somewhere I have another couple of pictures I could use, but those will have to wait for a less busy day.

Wednesday, February 04, 2026

A fun handcrafted gift tag


 I made a fun little tag after Christmas.  We had some gifts to give our friends but didn't get to see them before Christmas due to illness.  I had wanted to make this tag as not only a part of the gift wrapping but also as a little keepsake they could hang somewhere in their house.

The idea for this tag came from one of the large format Gooseberry Patch Christmas books --  Book 11.  Apparently, I have not reviewed this book, but I need to.  For those interested in owning a copy, Thriftbooks has a like-new, hardcover copy here for $5.99.

I found this tag idea in a chapter titled "Greetings & Gift Wrap" and the specific name of the project is "Greenery Package" on page 67.  I opted not to do the greenery/pine cone trimmed package because I wanted to use this tag on a gift bag.  But the gift wrapping idea is fabulous and I will use it another time.

The directions for the tag aren't very detailed.  They say: "Use decorative edged scissors to cut out a black & white photocopy of a favorite wintry photo.  Tie broken sticks together with rusty wire to make a frame.  Wire it to the photocopy.  Use adhesive foam dots to adhere a vintage tag to the frame and the photocopy to the package."

I snagged the photo of our friends off her blog, and changed it to black & white.  I didn't wire the frame to the photocopy, but hot-glued it. I also embellished it with a rusty metal snowflake since I found some in the stash with my wire.  But a teensy pine cone and sprig of greenery would also have looked nice.  I didn't use the vintage tag suggested and, since I was using it for a hanging tag, just added a nice metallic thread hanging loop. 

Our friends were surprised and delighted with this special tag! I'm thinking that I will post about this again for Christmas in July.  Summer would be a great time to gather the necessary sticks for the project.

Wednesday, July 16, 2025

A unique project: transferring a picture to a candle


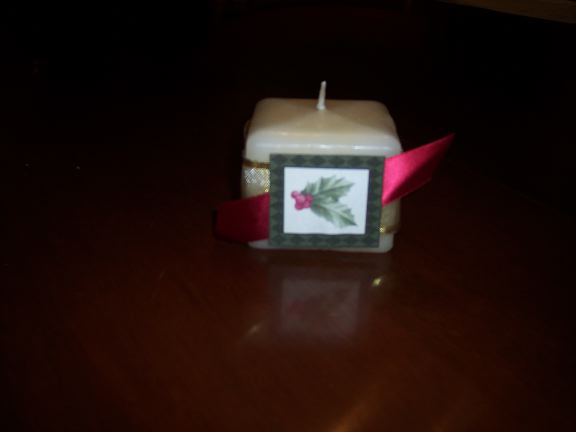
 I've had this idea saved for awhile, and it occurs to me that summer might be a nice time to try it.  This is not the same as what I have pictured at top; that one was made very simply with card stock cutouts and ribbon.  As you will see, the project I'm linking to today does not involve an actual candle, but the flameless type which makes the procedure much safer.

This tutorial is from Diana at Dreams Factory: How to Put a Picture on a Candle.  

The tutorial includes some beautiful printables to create candles for either Christmas 

or Autumn.

Other than the printables, supplies needed include a printer (laser for best results); tissue paper (plus paper tape and card stock to use in the tissue paper printing process); scissors; wax paper; flameless battery-operated WAX candles (not plastic); and a hair dryer or heat gun.

After printing your design of choice on tissue paper following Diana's directions, you then proceed to apply it to the candle using wax paper and a heat gun or hair dryer.  I won't go into detail here; you can read Diana's post for yourself and see just how it's done.

What do you think?  Is this a technique you would attempt?  The result is certainly beautiful!


Tuesday, February 25, 2025

Rudolph Day!


 I just realized that today is Rudolph Day for February.  I don't have time for a lengthy post, and realistically nothing Christmasy is happening today, but I thought I would at least acknowledge the occasion.

Above is just a tiny bit of my February decor, which I am sharing today because it includes a Rudolph -- well, at least a deer.  You see him at the left of the photo.  Though he looks almost new, he is actually a ceramic candleholder from my childhood in the 1950s.  The little framed crewel of the skating boy was stitched by me in the 1970s.  The little beaded heart was made by grandchildren and the tag at right was one of my first attempts at paper crafting.

The wintry pitcher was a thrift store find a few years back, and the cardinal in the middle was found in a kitchen drawer while cleaning out my childhood home.  The sparkly runner underneath it all was hand woven by my friend Patty.  It looks like it's black and silver, but what looks like black is actually a very dark green.  So pretty!

One thing I plan to do today is to sort through my box of seasonal paper decorating treasures and winnow out what I no longer use.  So I guess we could call that a legitimate Rudolph Day activity.  Happy Rudolph Day, everyone!


Sunday, July 28, 2024

A sweet bookmark design to make for stocking stuffers!


I've mentioned before how much I love The Graphics Fairy for free vintage graphics.  I'm really just beginning to look at the many amazing craft tutorials they offer.  I found this Printable Songbird Bookmark design that I really want to try, and thought that I would share it with you all.

Cardinals are a favorite bird for many people.  At the top of this post is a page I had saved from a small calendar.  I've had it for many years and finally scanned it, along with other bird images from the same calendar.  I thought it was perfect for this particular post.  

The tutorial was written by Diana from Dreams Factory.  She mentions that the cardinal image with green leaves that she used for the free printable bookmarks is from an 1840s natural history book.  How interesting!  She placed the bird image on a piece of handwritten French ephemera as a background.

The printable contains a total of six bookmarks, so you can make a number of these at one time.  You can finish the edges simply with distress ink, or do a fancier edge with gold foil.  Diana tells you exactly what products to use and how to do this.  

I think if I were to make the simpler bookmarks I might punch a hole in the top and add a cord and tassel or a piece of ribbon to it.  If I get brave and try the gold foil technique, I would not bother with any further embellishment, since these are elegant as is.

Image from The Graphics Fairy
 
As I mentioned, these bookmarks would make a lovely stocking stuffer, or a small gift for an acquaintance or coworker.  They would also be the perfect addition to a book you may be gifting someone for Christmas.  Have fun with this wonderful idea!


Friday, July 26, 2024

A fun paper crafting project!


One of my favorite resources for graphics is The Graphics Fairy.  The lovely Christmas graphic above is from their site, in fact.  I haven't tried any of their tutorials yet, but that is going to change.  I thought I would share these beautiful faux Christmas stamps with my readers.

Of course, you can't use these to mail a letter or Christmas cards.  They are not real postage stamps, but faux ones with a vintage look.  

Photo from The Graphics Fairy
 
They are, however, a lovely project that would add a sweet vintage touch to many a Christmasy project.  The full instructions are available, and there's a free downloadable Christmas stamp printable with many gorgeous designs.  It can be printed out on card stock or, if you prefer, sticker paper.  Thinning shears, like those used on hair, are used to create a pretty "perforated" edge. and touches of gold are then added with a calligraphy pen and gold ink, or with a metallic gold marker.  Then the stamps are ready to use on your gifts and paper crafting projects!

Photo from The Graphics Fairy

Aren't they beautiful?  I really hope to make some of these!


Wednesday, February 07, 2024

A sweet handmade Christmas card


Here is a sweet handcrafted card I've saved from a few years ago, made by my Canadian friend Tania who is a crafter extraordinaire.  I just love it and have saved it not only because it's so creative but because of the heartfelt message inside.

It's so simple and if I can find a similar stamp, I just might make some for next year.  Tania started with plain white card stock and you can see she stamped this really fun saying on one side, and scalloped the edges of the card.  Next to the saying she placed a textured paper rectangle with rounded corners -- so nifty -- which resembles wood grain.  

Atop this is a piece of antique-looking cotton lace, a simple bow tied out of ordinary string, and a chipboard letter (in this case S, for the first letter of my first name).  She gilded the edges of the letter a little bit.

The finishing touch is a few sequins in complementary colors scattered about, and then of course a handwritten note inside the card.  Isn't it lovely?

Friday, December 15, 2023

Some fun images for your Christmas papercrafting


Have you folks visited The Graphics Fairy?  Karen has a collection of 761 Free Merry Christmas images for your crafting pleasure.

Many of the images are older -- Victorian, even -- but there are some, like the one at the top of the post, that are from the 1950s.  I love the mid-century graphic, likely because that's when I grew up and my childhood Christmases are all tied up with images like these.  Karen said that she scanned the poodles and wreaths from a wrapping paper sample book.  What a fun find that book must have been!  

Here are examples of a few more images:


A sweet retro village
Adorable vintage bunnies and a chickadee
A pretty red and green house
A gorgeous vintage postcard with roses, church, and even a Bible verse

There are many, many more wonderful images to check out at The Graphics Fairy.  I hope you'll enjoy using this fantastic resource.


Thursday, July 06, 2023

Old-Fashioned Christmas coloring fun


 I recently came upon a website new to me, Paper Doll Review.  I loved paper dolls as a kid and often made my own using magazine advertisements as "fabric" to create their dresses and other outfits.  It's sad to me that today's girls don't seem as smitten with paper dolls as I was.  But hope springs eternal, and some of my younger granddaughters may yet take an interest in this classic activity.

This website has many different categories of paper dolls, and it has some coloring books as well.  I was thrilled to discover that it has a "Christmas Corner" with holiday paper dolls, coloring books, etc.  I took a screenshot of the Old-Fashioned Christmas coloring book:

You can find it here on the website and learn more details about it.

This Candy Cane House coloring book also looks like fun.  It's a reproduction from the 1950s and sells for $7.50.

There are a half-dozen more coloring books as well as other Christmas activities in this section of the website.  I'll be sharing more about the Christmas paper dolls later this month!

Tuesday, July 19, 2022

A fun gift or stocking stuffer for creative children


Photo from Pixabay

Here is a really fun little idea if you know children who enjoy painting with watercolor sets.  Back in the day, my kids loved to receive a new watercolor set, or maybe a paint with water book.  I think most kids instinctively like to paint (and most parents instinctively dread the mess that can accompany painting).

This idea for a gift set using a box of watercolors and some printable coloring tags looks like so much fun!  And there's an upcycling aspect to it in that you use a heavy business-size envelope, folded, to make the gift pocket to package it all in.

The graphics were a team effort between Keren at Free Pretty Things for You and Lori at ChouxChoux Paper Art.  Aren't they just the most adorable vintage images?  They remind me of when I was a child, sometimes the kids in our family would receive a set of little activity books for coloring, dot-to-dots, mazes, crafts, etc.  The covers were always really nifty and resembled the design on this gift.


Image from ChouxChoux Paper Art

I might try this out for some of the kids in my life.  I almost think I have everything I need on hand to make some of these  What about you?

Monday, July 04, 2022

Garland of mini stars


 I've been on the lookout for a project with a patriotic look that could also be adapted to use at Christmas time.  I think I've found it with this 3-D Mini Star Garland from Hawthorne & Main.

One starts by printing out and cutting out the stars.  A line is then scored from the point of each star, and the stars are folded on these lines to produce a 3-D effect.   Holes are then punched at the top point of each star, and the stars are strung on pretty striped bakers' twine.

Photo from Hawthorne & Main.
 

This is such a pretty patriotic garland, but a Christmas version would be lovely with all white stars (maybe edged with white glitter?), all red, all green, or a combination of red, white and green.   I'm planning to make some of these!


Tuesday, December 14, 2021

A simple craft project


The other day when four of our local grandkids came over to make candy, I suggested maybe we would do a simple craft as well.  I was thinking that when we came to parts of recipes where things needed to chill or set for awhile, a little craft might be a good way to pass the time.  

Some years ago, I received this gift tag as a tuck-in in a Christmas card exchange:

Front of tag

Back of tag

 
As you can see, it's creatively made from a game card; a Dutch Blitz card, to be specific.

I didn't use it, but held onto it thinking I might like to use the idea to make some tags of my own.  From what I can tell, the creator of this tag stamped the snowman motif onto a small tag shape made from white card stock, then glued it to the Dutch Blitz card and punched a hole through both layers to add the striped twine.  There's a strip of washi tape along the bottom of the tag.  The back simply looks as if it has been scuffed up with sandpaper and "to" and "from" added with alphabet stamps.

I decided to try this project with the grands.  I'm pretty sure that I have some Dutch Blitz cards found at the homestead, but couldn't find them so used Uno cards (from the same source, set aside for the purpose) instead.  

 I then put out washi tape, card stock and scrapbook paper, rubber stamps and stamp pads, hole punch and twine, along with glue sticks and old Christmas cards.  And also, very important, the transfer art images shown at the top of the post.  The kids had a blast with this idea and produced some very creative tags.


Below are some of the tags they ended up with.  I was especially taken with the red-and-green striped tag.  Printed cardboard from an old candy cane box was glued to a red Uno card and details added with the paint transfer rub-ons.  "Open" was stamped on using alphabet stamps, and "Dec 25" was added using a library card-type stamp.  They are all great, though, and are different on both sides.  They would even make fun ornaments or would look nice as part of a garland or banner.

I'm impressed with their creativity using very simple materials.  Now I can't wait to try this project for myself, as I didn't have time to do so that day.

Wednesday, July 21, 2021

Large and lovely stars to decorate your home


 Stars are such a lovely symbol of Christmas!  I enjoy decorating with stars among other shapes and symbols at Christmas.  Strings of stars are pretty, and of course star-shaped Christmas cookies are absolutely classic.

This past winter at my friend Amanda's home,  I couldn't help but notice some gorgeous brown paper stars she had hanging from the ceiling.  They were so pretty and at first I almost thought they were snowflakes.  When I asked about them, Amanda told me they were made from paper bags!  Paper lunch bags, to be specific.

Photo from Delineate Your Dwelling
 Amanda kindly sent me the link to the tutorial for these Paper Bag Stars.  The designer is Amy at Delineate Your Dwelling.  What a lovely idea this is!  Amy notes that these could be intermingled with white paper snowflakes and white paper chains for a really magical effect.

I definitely hope to make some of these for Christmas and winter.  I love the look of the brown paper, but they could be made with white lunch bags or any other color, I would think.  Have fun with this idea!

Friday, March 05, 2021

February Christmas Club meeting


 Appropriately enough,  it was Rudolph Day (the 25th) when the Christmas Club gathered for its February meeting.  Susan, Carrie, and I gathered around Susan's dining room table specifically to work on making gift tags out of our used Christmas cards.  I think that Carrie and Susan were working with last year's cards, while mine were a much older batch.  We shared a tag punch, templates, hole punches and so on -- passing them around by means of the "lazy Susan" that's built into the round table.  Very handy!

Susan served us some lovely holiday tea in Christmas teacups and with the festive napkins above alongside.  (I snatched up my napkin as I left, so that I would have something to illustrate this post!)

I didn't take time to scan my completed tags, so will share some from a previous year.  I think I completed maybe 8 or so at the meeting.

For next month, Carrie is planning to print out a December calendar for each of us.  We will use these to begin planning for some Christmas events.  Sounds like fun, and it will be good to have some things pre-planned.  Then, closer to the time, as other events come along, we can fill those in.

Hope your Rudolph Day included some festive fun also!

Wednesday, February 24, 2021

A little snow globe inspiration


 On Monday, it snowed steadily all afternoon and into the evening ... it felt a bit like living in a snow globe!  

 And also on Monday,  I came across a couple of fun snow globe ideas that I thought I'd share with all of you. 


 The above is a piece of 6" scrapbook paper from a set called Snow Globes.

I blogged about this set back in 2015 when I purchased it, as you will see if you click the link above.  Back in late November, I took some paper from this set and the other one I got at the same time, over to our camp for grandkids to craft with.  The other day, I was putting some things away and came upon the remaining papers from this set.  Oh, this one is so sweet!  It's really inspiring me to make some simple snow globes (minus the water) from jars,  just to use in winter decorating.

I did a bit of a search to see if I could find any of this paper still on Etsy or eBay, but struck out with that.  I did, however, find these adorable paper snowglobe kits:


They are out of stock, but maybe can still be found somewhere.  A kit makes 12.  They are so cute!

The same day, in sorting through some things I had saved for scrapbook journaling, I came upon this:

Oh, aren't those snow globe cookies the cutest?   This was from a King Arthur Flour catalog, but maybe not a very recent one, for I couldn't find them in the online store just now.

The closest I came was these Falling Snowflake cookie stamps.  


They are on clearance right now, $14.95 for a set of 3, which is still a little pricey for me. 

And all of this reminded me of these felt ornaments


which I've been wanting to make for years: Felt Snowglobe Ornaments.  Maybe this will be my year!